|
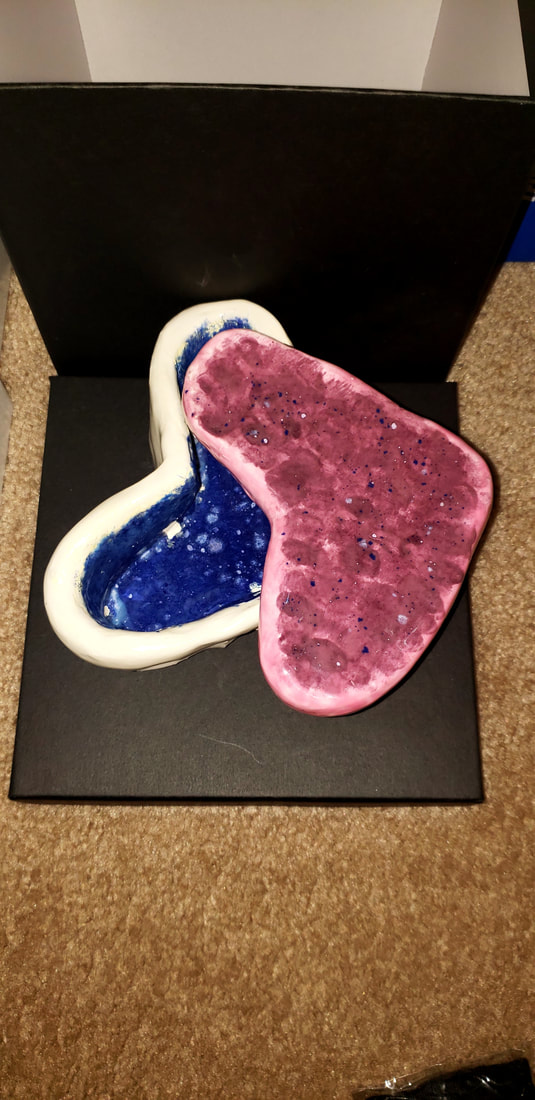
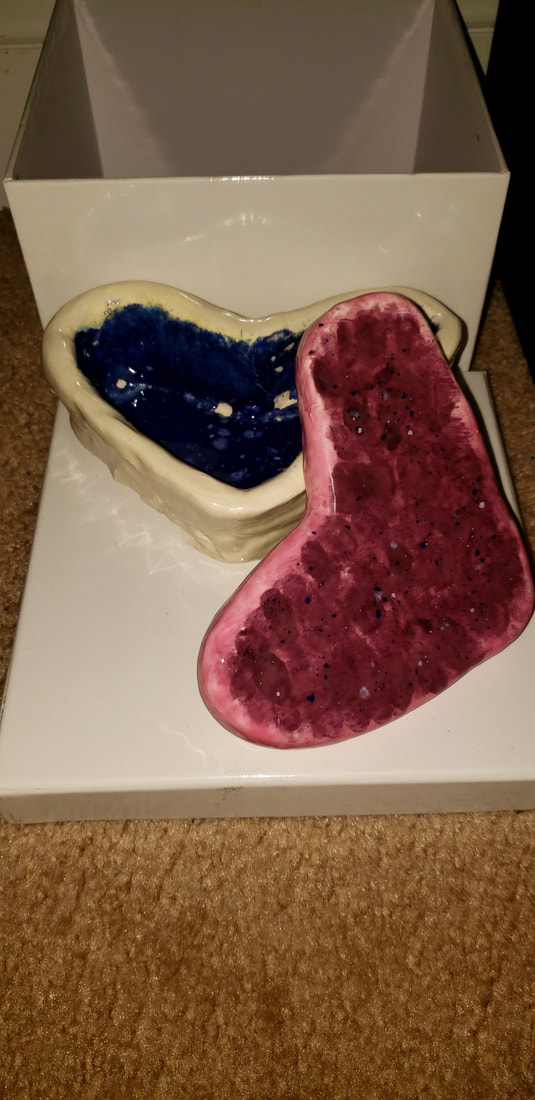
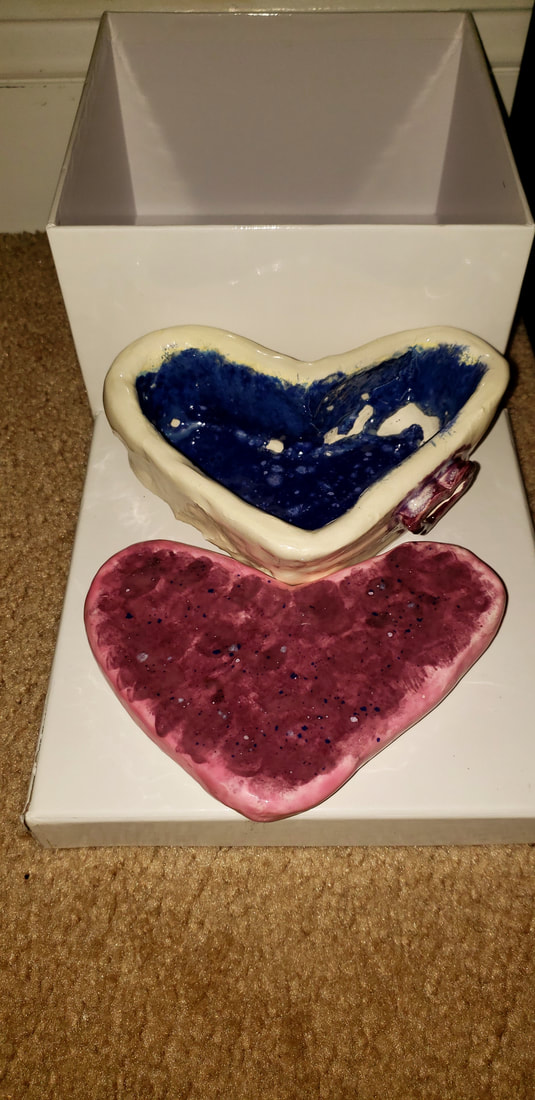
1) Since my in progress post I have completed the top which i cut out of a slab a clay. Next i put in the kiln and fired it , which I then Glazed my piece using pink, purple, blue,light blue and clear. Lastly I fired my piece again to melt the glaze and I am finished.
2) The most successful thing about this piece is the color choices i choose. 3) If I were to change it I would have probably broke the heart off the side.
0 Comments
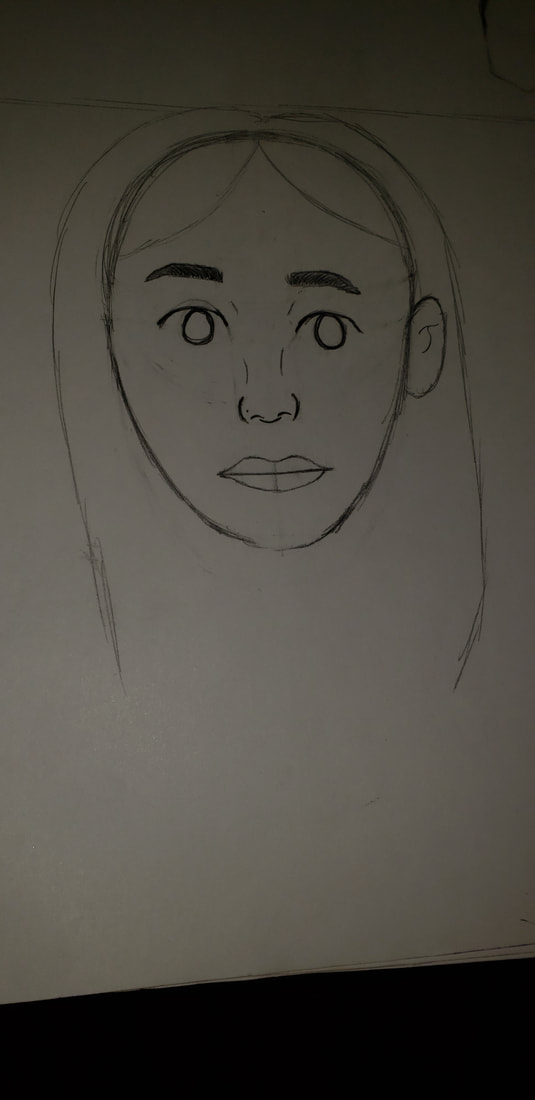
1) the picture of the person I decided to do was of myself only because of the fact that I felt that if I did anyone else they might have gotten a little offended if it didn't turn out they way they wanted it to or it didn't turn out looking like them.
2) the medium's I used was charcol and chalk 3) First I traced the main features of ,y face using the projector onto the paper. Next, I used vine charcol and cover the paper and blended it in. Next, I used a charcol pencil and traced the features of my face. Next, i taped the paper to the board, and I taped the paper so it was the correct size for me to work on. Then, i started working light to dark starting with all my highlighting then the lighter parts of my skin then my skin then the shadows of my skin. Then, I used a little bit of light blue the lessen the intensity of the orange I used for my skin. And lastly, I put the hairs into my eyebrow, eyelashes, and colored in the eye. 4) i think the most successful thing about this piece is the eye just because it looks so realistic, but if i could complete this piece again i would probably have found a better way to do the skin just because I do look so orange but other than that this piece was largely successful and I love it. 1) the most helpful warm up was the face proportions warm-up because it helped me figure out where to place all my facial features on my drawing even though I was only doing half of a face.
2) The most suprising the i found about the facial proportions was that your head is five eyes wide and there is exactly one eye space in between both of your eyes as well as the front part of your eyebrow lines up with the put side of each nostril. 1) This piece involves the concept of line because due to the design of my print all most of it is straight lines.
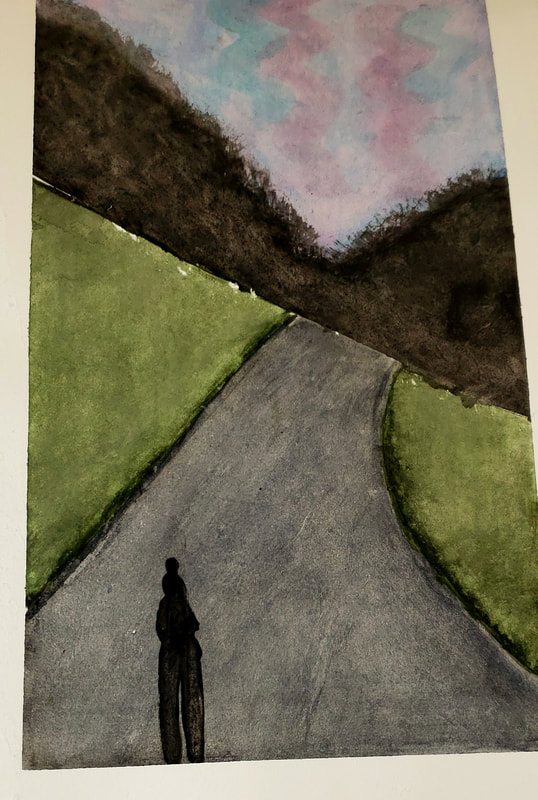
2) My piece is successful because of the fact that it turned out well and just the way i wanted to if I could change anything about it I would have done my linoleum block print in more colors. 1) I used 1st perspective to paint this picture.
2) When I took this picture I was walking down there street and i seen the sky was purple and i took the picture. 3) The most difficilt tjing about this prohect was trying to gwt the colors to blend and the sky without the paper peeling. 4) The most helpful watercolor warm-up was the ont that consistes of the most important techniques like (flat wash wet-on-wet, dry brush reaiatant, salt saran warp, layer wet-on-dry, drop tolt, and ombre gradient wet-on-wet) and how ro do them. The second warmup i choose as the most helpful peespective warm up was the hallway drawing. This warmup was so helpful because it showed me how draw and make everything meet pojnt far point in the paper. page 48-
Creating The Print Plate- A printing plate is the surface on which the desired image is created. In producing a printing plate, the artist makes a mirror image of the final print. Letters and numbers must be made backwards on the plate. Inking The Plate- The artist applies in the the plate. This is done with a brayer, a roller with a handle. For a multicolor print, one plate must be made for each color. The ink creates the image on the print. Transferring The Image- The paper or other material is pressed against the inked plate, and the ink is transferred to the new surface. Sometimes this is done by hand. Other times a printing press is used. Usually, more than one print is made from a single plate. Together, all the prints made from the same plate, or set of plates, form an edition. Each print in an edition is signed and numbered by the artist. The printmaker signs the work in the bottom margin and writes the title on each print of an edition as well as the number of each print. the number 10/200 indicates the tenth of 200 prints. Relief Printing- In this method, the artist cuts away the sections of the surface not meant to hold ink. As a result, the image to be printed is raise from the background. page 330- Woodblock- this is making prints by carving images in blocks of wood. Using the technique, artists could produce many inexpensive prints of one image. Utagawa Hiroshige, also known as Andō Hiroshige, was a Japanese ukiyo-e artist, considered the last great master of that tradition. Hiroshige is best known for his horizontal-format landscape series The Fifty-three Stations of the Tōkaidō and for his vertical-format landscape series One Hundred Famous Views of Edo. Step- Step 1- trace the shape of your piece of linoleum onto a page in your sketchbook. Using the ruler, connect the opposite corners of the rectangle to find the center of the shape. Place the point of the compass on that center and draw the largest circle possible within the shape. Select your best design and draw it in the circle. Step 2- trace you finished design onto the tracing paper. Use a piece of carbon paper to transfer the design from the tracing paper to the piece of linoleum. Step 3- using a draw marker to color the lines and shapes on the areas of linoleum that will not be cut away. Step 4- use a bench hook to hold your linoleum safely in place. You have let the linoleum in the shape of a rectangle so that it can be held in place by the bench hook. Do not cut it into a circle until all you linoleum cuts are finished. Use the narrow V-gouge to outline shapes. Always use the cutting tool in an outward motion away from your body. Use wider U- gouges to cut away the negative areas. The pattern of your cuts will show in the final print. Plan the direction of the cuts as carefully as you plan the positive shapes in your design. Finally, use the V-gouges to cut the fine lines on the positive shapes. Step 5- select your paper to make an edition of five prints. Locate your drying place. Squeeze out an inch of ink onto the inking plate. Roll the brayer in both directions until it is loaded with ink. Ink the linoleum. Make five prints. When they are dry, sign each one in pencil at the bottom of the print. Write the title on the left, the number in the center, and your name and date on the right. The number should include the number of the print and the total number of prints in the edition. 1. I found learning the drop tilt technique was most helpful as well as the wax resistant.
2. I don't necessarily like water color. 3. Brush control.
|
Archives
January 2019
Categories |


 RSS Feed
